Last updated: April 2026 · Written by Henrik G. Lindhagen, CEO & Founder, FF Rollerskis
Roller skiing for beginners has a reputation for being difficult and dangerous. In reality, most of that reputation comes from people who started with the wrong equipment, no safety gear, and no structured approach to learning. This guide gives you the complete, honest picture of how to start roller skiing safely and efficiently — whether you’re a cross-country skier looking for summer training or a complete newcomer to Nordic sport.
Step 1: Choose Your First Roller Ski Setup
Before you ever clip in, you need three things: roller skis, boots, and poles.
Beginners should always opt for classic roller skis. The classic technique, characterised by the diagonal stride resembling an exaggerated walking motion, is much easier to grasp for those new to roller skiing compared to the skate technique. Additionally, classic roller skis are typically longer and feature slower wheel speeds by default, providing greater stability and better speed control on gentle inclines. For a comprehensive comparison, refer to our Classic vs. Skate guide.
Boots: It is essential to have a cross-country ski boot that is compatible with either the NNN (New Nordic Norm) or SNS (Salomon Nordic System/Prolink) formats. Ensure that your boot system corresponds with the bindings of your roller skis. FF Rollerskis provides both types of bindings across all their models. Avoid using trail running shoes, hiking boots, or cycling shoes, as they will not fit the roller ski bindings.
Poles: Use your regular cross-country ski poles. If you don’t own them yet, roller skiing poles are the same as classic or skate ski poles. Classic pole length = roughly your height minus 25 cm. Skate pole length = height minus 15 cm. Replace your standard snow baskets with small road baskets (also called “roller ski tips”) — they’re narrower and designed for asphalt.


 1")
 2")
 3")
 4")
 5")
 6")
 7")
 8")
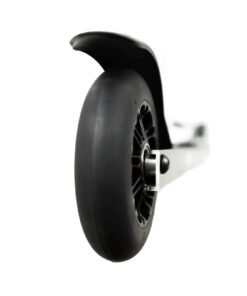
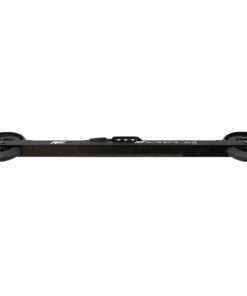
FF Active Skate Rollerskis
World Cup stability at an entry-level price. Engineered by certified mechanic Henrik Georg Lindhagen to eliminate the ‘wobble’ beginners face, the FF Active Skate delivers professional-grade tracking and safety for every skier.
-
Ultra-Lightweight Performance: Weighing only 850 grams per ski, offering effortless handling and superior swing-weight.
-
Stability-First Geometry: Lowered center of gravity for maximum balance and control.
-
Premium Materials: CNC-machined 6089 Norwegian aluminum frame (Hydro/Alumeco).
-
Pro-Level Heritage: Official FIS Supplier equipment used in the Rollerski World Cup.
-
Ready to Roll: Pre-mounted with Salomon Pro bindings (NNN compatible) or Rottefella.
Step 2: Get the Right Safety Gear (Non-Negotiable)
Unlike snow skiing, roller skiing on asphalt removes the soft landing. Falling without protection on asphalt at 20 km/h produces the same injuries as a cycling crash. Before your first session, buy:
Helmet: A road cycling or ski helmet. This is the single most important piece of safety equipment and is non-negotiable for beginners (and recommended for all levels). Wrist fractures are the most common roller ski injury — followed by shoulder and elbow injuries from falls. A helmet prevents the most severe outcomes.
Wrist guards with hard splint: Standard inline skate wrist guards with a rigid palm plate. These dramatically reduce the wrist fracture risk from the natural instinct to break a fall with outstretched hands.
Knee and elbow pads: Recommended for the first 5–10 sessions. Once you have basic balance and speed control, you can reassess.
High-visibility vest or jacket: If training on any road shared with vehicles, wear high-vis. Dawn and dusk — peak training hours — are low-visibility conditions for drivers.
Step 3: Choose the Right Location for Your First Sessions
Your first 3–5 sessions should be on:
- completely flat
- smooth
- traffic-free asphalt.
- Ideal locations:
- Dedicated roller ski tracks (check your local cross-country ski club — many maintain summer tracks).
- Large empty car parks.
- Closed airfields or industrial estates on weekends.
- Flat bike paths with good asphalt quality.
Avoid:
- roads with traffic
- cobblestones
- gravel patches
- speed bumps
- any route with descents you have not pre-walked to assess the gradient.
- A descent that looks gentle from a car is often surprisingly steep on roller skis.
Step 4: First Session — The Basic Movement Sequence
Start without poles. Click into your bindings and stand still. Feel the ratchet locking when you push straight back. Find your balance over the ski mid-point. Take your first gliding steps without poles — short, controlled, at walking pace. Get comfortable with the feeling of the wheel releasing and gliding before adding any speed.
Add poles after 10–15 minutes. Once you can maintain balance and do controlled kick-glide steps without poles, add poles using a light double-pole push to increase speed gently. Do not attempt to do diagonal stride with poles until you have several sessions of bare-pole comfort.
Practice stopping from the start. Stopping is the hardest skill in roller skiing. From your very first session, practice stepping onto grass from low speed, and practise the pole-drag braking technique (both poles angled behind you, pressing down hard on the tips). If you use FF Rollerskis with the Universal Brake System, practise deploying the brake at low speed before you need it at high speed.
Start practising stopping from the very beginning, as it is the most difficult skill linked to roller skiing. In your first session, concentrate on transitioning onto grass while maintaining a slow pace, and try the pole-drag braking method (keeping both poles behind you with the tips pressed down firmly). If you are using FF Rollerskis fitted with the Universal Brake System, ensure you practise activating the brake at a low speed before needing it at faster speeds.
Common Beginner Mistakes to Avoid
Going too fast too soon. Build speed gradually across multiple sessions. The wheel ratchet and long frame do not protect you from speed — they only affect the kick phase. Once you’re gliding downhill, you are at the mercy of gravity the same as on any wheeled vehicle.
Training on wet roads. Wet asphalt reduces wheel grip by 30–50% and makes pole planting unpredictable. Never roller ski in rain or immediately after rain. The road surface should be completely dry.
Skipping the safety gear. This mistake is made most often by experienced skiers who assume their snow-skiing confidence will transfer directly. It doesn’t — at least not to the braking part, which is completely different.
Using worn or cheap bearings. If your roller skis feel rough or rattle when you spin the wheels by hand, the bearings are worn. Rough bearings create unpredictable rolling resistance that can cause unexpected lurches. Replace immediately. See our Wheels & Bearings Guide for specs and replacement intervals.


 17")
 18")
 19")
 20")
 21")
 22")
 23")
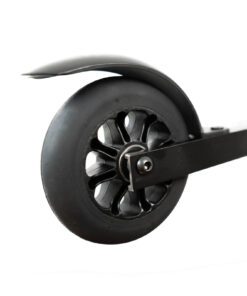
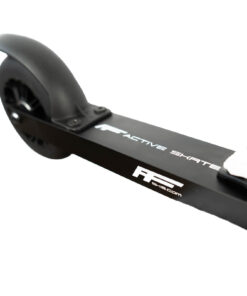
FF Universal Skate Brake
The FF Universal Skate Brake is a revolutionary 20g safety system designed in Norway. It replaces heavy, clunky mechanical brakes with a pole-activated fender that fits all major brands like IDT and Swenor. Unlike traditional brakes that flat-spot wheels, our unique “wheel forging” technology reshapes the rubber as you brake, keeping wheels round and improving grip on wet asphalt. Perfect for elite athletes and safety-conscious amateurs alike.
How Long Does It Take to Get Good at Roller Skiing?
An individual with prior cross-country skiing experience will require around 3–5 sessions to gain a sense of competence, while achieving fluency might take 10–15 sessions. For someone entirely new to Nordic skiing, it usually takes 8–12 sessions to attain basic fluency on flat surfaces, and a complete season to cultivate proper technique. The learning curve is most pronounced during the initial three sessions, after which it declines significantly. Many who abandon roller skiing tend to do so within the first two sessions, often before they reach a level of competence. If one can persevere through the initial three sessions, the sport tends to become enjoyable quite swiftly.
Beginner Roller Skiing FAQ
Do I need to know how to ski before roller skiing?
No — but it helps significantly. Cross-country skiing experience transfers directly to roller skiing. Complete beginners can absolutely learn roller skiing from scratch, but should plan for a longer technique-building phase and are especially strongly advised to start with classic technique on flat terrain.
What is a good training volume to start with?
2–3 sessions per week of 30–45 minutes. Do not start with long sessions — technique breaks down quickly when fatigued, and tired roller skiing on roads is genuinely dangerous. Build to 60–90 minute sessions over 4–6 weeks as confidence develops.
Can children learn roller skiing?
Yes. Children from around 8–10 years can start on shorter beginner roller skis with slow wheels. Full protective gear is essential. FF Rollerskis offers youth models — see our complete guide to roller skis for kids.
Is roller skiing good exercise?
Extremely. Roller skiing engages the legs, glutes, core, back, shoulders, and arms simultaneously — delivering full-body cardiovascular conditioning that running and cycling cannot replicate. It is used by national ski teams specifically because of this total-body loading at high training intensities.
Ready to start? Browse FF Rollerskis beginner-suitable models or read our Complete Roller Ski Buyer’s Guide for full specifications and comparisons.